back to home!   back to home

Putting on Ears

Whole-Ears | Ear Tips | Make-up | Care Instructions

   Many people want to add to their costume look by using pointy ears. And there's lots of ways of getting them. The most widely known are probably the Woochie (brand) ear tip - sold as 'Space Ears', and what I prefer which are the whole-ears made in Germany by Lederkram. Other places sell various ears, but they are still either tips or whole ears. So now that you have some, you want to know how to put them on. It's easy! Ok, it is easier to have someone else put them on you, but it's still not that difficult. Use a mirror.

You'll need 1) pair of ears/tips 2)adhesive such as Liquid Latex or Spirit Gum 3) remover - if you really think you need it

I strongly advise foundation make-up as well, maybe 1 shade darker than your skin tone, and setting powder
Gentle cleanser such as Albolene or Ponds Cold Cream.  Tissues, face moisturizer

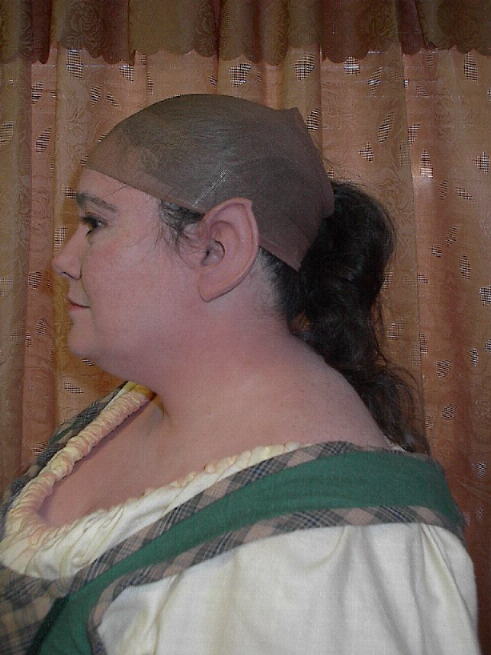
Before you begin: wash & dry your face and ears to get all dirt and oils off the skin.
If you are going to use make-up on the latex ears/tips (and please do!), do it now because you won't be able to do much except touch-ups once they are in place.

Whole-ears

such as Lederkram's Hobbit or Elf ears. (note: Woochie 'space tips'  and Lederkram elf ears come in both a small/normal size as well as a large size. It only refers to the length of the point, nothing to do with the size of your ear)

Step 1
 Place the latex ear on your ear so you can see where the edges contact your skin.


Step 2
dab of adhesive at top and bottom  
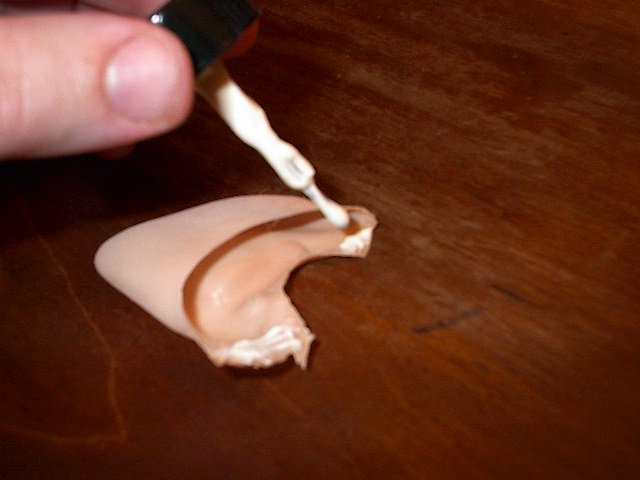
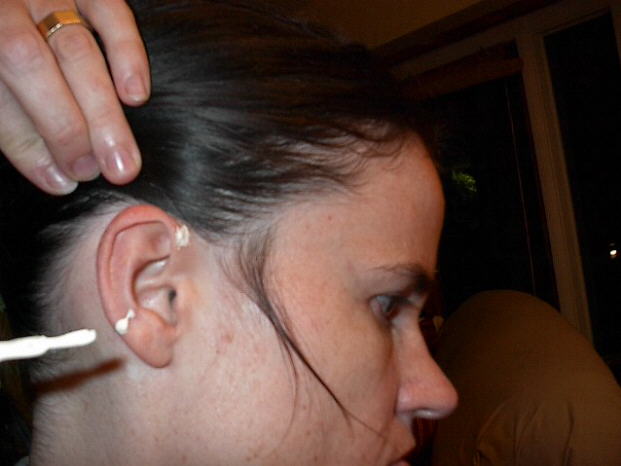
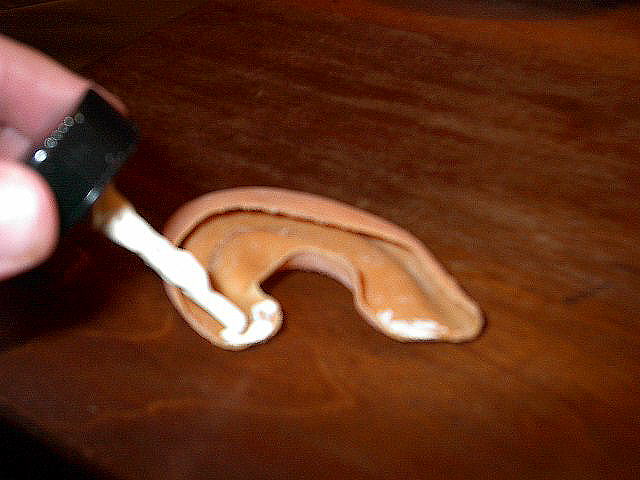
Place a dab of adhesive on the inside of the latex ear at the top and bottom where it hits your face. Careful, as they used to say: a little dab will do ya! You really don't need a lot. Let it sit and get 'tacky' while you go on to step 3, it only takes a minute or so to set up.
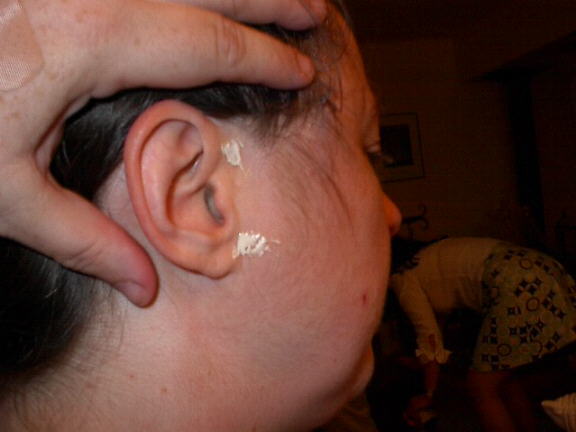
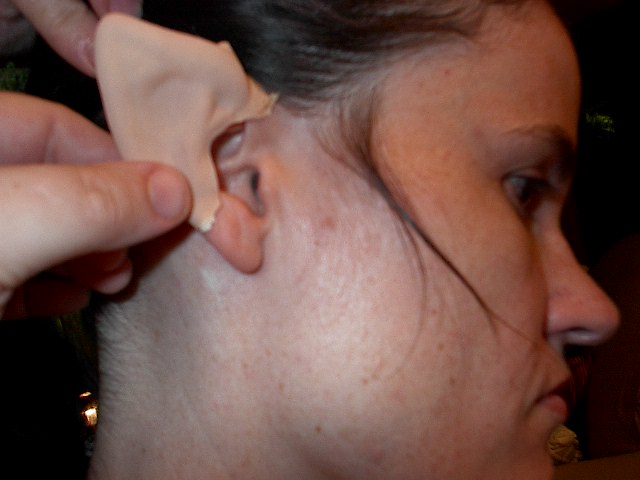


Step 3adhesive on you!
Place a similarly small dab of adhesive at the same two points the ears contacted your face. Again, a little dab'll do ya!

WARNING: make sure to keep all wispy hair bits out of the way! especially if you use the Liquid Latex (which is my preference, but your mileage may vary). Liquid Latex will peel easily of your skin just like school glue does, but it WON'T peel off hair; it will only rip out hair if you persist. So keep those "wispies" away. If you're going to wear a wig, put the wig cap on first to keep them away. If you do get stuff on your hair, it won't kill you, but you'll go 'ow' when you take them off.

Let this get 'tacky' as well before you go on to step 4.

note: I usually add a dab of adhesive also along the inner curl - not much - just enough on both my ear and the latex, and pinch that closed to help hold the center to my ear. It will stay on just fine without doing this, I just try to minimize extra shadows or lines.


Step 4
position the ear
Ok, carefully place the latex ear over your own ear. Make sure that the top of your ear is INSIDE the latex top, this helps hold it in place. Make sure you've got it positioned the way you want them to point. In general, they're really only going to fit on your face in a certain way, with the top edge of the ear in front of your top ear edge, and the bottom around your ear lobe to the side of your face. If you have smaller ears, you may need to tuck them up against your face a little more until the look right. As long as your ear is inside the fold at the top, you're fine.

Now press the two spots where you dabbed the adhesive onto the two spots on your face where you put adhesive, hold for a few seconds and release.

Step 5
    Repeat with your other ear. Nothing looks quite as silly as an elf or hobbit with one pointy ear!

Ear Tips

(note: Woochie 'space tips'  and Lederkram elf ears come in both a small/normal size as well as a large size. It only refers to the length of the point, nothing to do with the size of your ear)
Step 1
    Place the ear tip over your ears to see exactly where they contact your skin at each end. Make sure your ear is inside the little "pocket". If you are concerned with the angle they sit on your ear (an advantage to using whole-ears!), use your finger joints and measure from a facial landmark. For example: you may want the top to fit exactly at the ear/face joint and the lower edge to be one knuckle of your index finger from your ear lobe. Or cheek bone. or specific curl of your ear. Just pick a spot and remember it for reference.

Step 2
adhesive on the two ends
Place a dab of adhesive at each end of the tip. Remember, a little dab'll do ya!

Let it get 'tacky' while you go to step 3.


Step 3
adhesive on your ear
Do your best to remember where the tip came to on your ear!  There will be one point at the top, this is where the widest edge goes because it will fold over to the back a bit and your ear is a little thicker there.  And.... a little dab'll do ya.

WARNING: make sure to keep all wispy hair bits out of the way! especially if you use the Liquid Latex (which is my preference, but your mileage may vary). Liquid Latex will peel easily of your skin just like school glue does, but it WON'T peel off hair; it will only rip out hair if you persist. So keep those "wispies" away. If you're going to wear a wig, put the wig cap on first to keep them away. If you do get stuff on your hair, it won't kill you, but you'll go 'ow' when you take them off.

Let this get 'tacky' before you go on to Step 4.


Step 4
position on your earPlace the latex tip over your ear. Make sure the top of your ear is inside the "pocket" as this helps hold it on. Position it carefully so that the tip points in the angle you want - remember your points of reference! it's ok to 
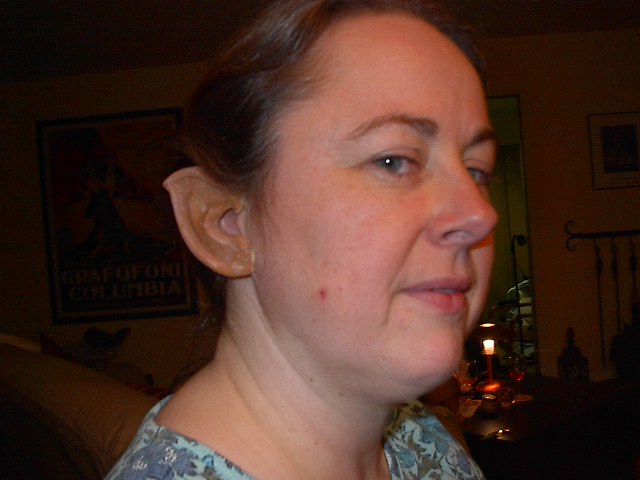
smear the adhesive around a little while you do this.
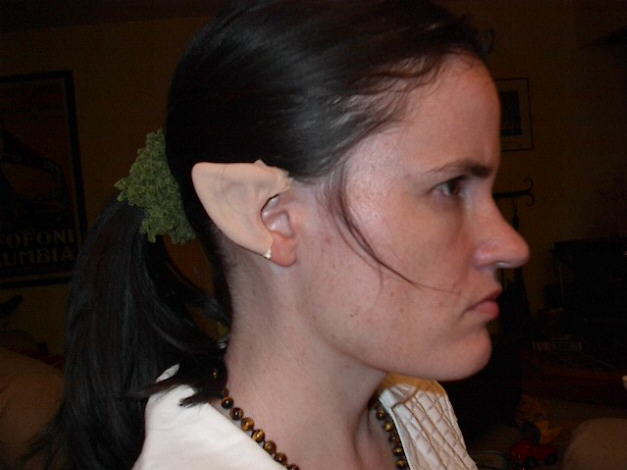
Carefully hold/press the edges of the tips against the matching adhesive on your ear so that they stick.  The advantage to using tips vs whole ears is that they can slide up or down over your ear  adjusting to whether you have small or large ears.  Mary has small ears and a low hairline near them, so I was trying to be very careful not to catch her ears. I should have spent more time angling the ear up a bit more, as it come out a little too horizontal. The ear tips are also fairly easy to carefully trim if they are too big - I use these for demos, so I didn't want to trim them. If they were her own, I'd have suggested it.


Step 5
edge blendingNow, we get to why I advised having some foundation makeup. As you can see, even though these ear tips are considered 'skin tone'... just like a band-aid, they aren't.  And it just doesn't look that good having the color so different and such an obvious line across that you can see it's a tip. It sorta ruins the "elfy effect".  This is what it looks like if you don't. So please...  use foundation and blend your edges!!! You'll look so much better and get more compliments.
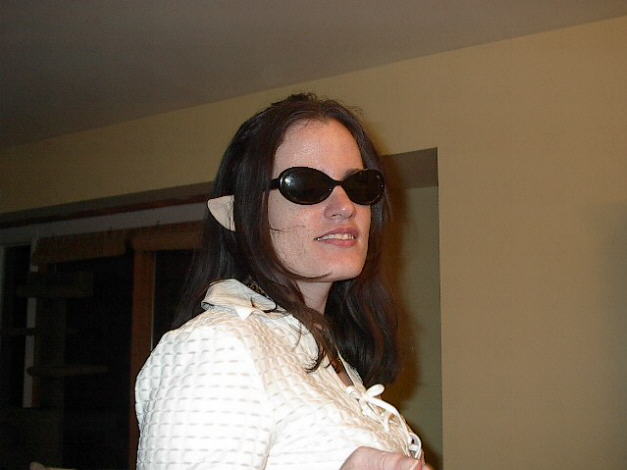
What you want to do, and this is why I like using Liquid Latex to begin with so that I don't need two products,  first make sure the adhesive is dry. Then take some Liquid Latex and dab it over and into the joint where the tip hits the ear. You'll see a bit of a crack sometimes. If not, just dab on top of the line to 'blend' the latex down to your ear. It's not as crucial at the top (especially if hair is in danger!), but it makes a big difference at the bottom.  Sort of pretend you are using 'white-out' to cover the line.

Once that is dry, take the foundation make-up that you've already painted all over the tip and carefully dab it onto the blended joint, and down a little onto your face. Once you're happy that it's pretty much evened out, dust with setting powder.


Step 6
    Repeat for other ear. Nothing looks quite as silly as an elf or hobbit with one pointy ear! Try to pay attention to the angles and see that they are both pointing the same direction. Yes, it's much easier to have someone else put these on for you. But you can do it! That's what mirrors are for.

Agent Arwen?


 And now you're ready to go out and strut your stuff! Thanks, Mary, for showing my ear tips.


Make-upHobbit ear with makeup

    Are you SURE you don't feel like bothering to put foundation on the latex ears/tip and blend the edges? Really, it looks so much better when you do. Just compare how Mary looks with her ear tip on, but not blended, and even Jonatha with her ear on (which is too dark for her skin tone) and no makeup to match her skin, with how a friend made me up when she taught me how to put on ears.  Unfortunately in order to keep the wig cap on me, my little wispy hairs won't stay tucked well. I just try to be very careful of them, and usually still end up pulling some out.
    Just use foundation make up that is a little darker than your skin tone - I prefer Ben Nye brand because that's what my teacher used, you can use street makeup as well as theatre makeup. After you have coated the ears/tips with foundation, dust them with setting powder (loose powder, not cakey stuff from a "street" compact).  Affix them according to your needs. Be sure to use some Liquid Latex to cover the edges and a dab more foundation to color the joint and smear it to your skin. Sure, you can get fancy with stippling sponges if you want, I don't go to that length. A Touch more of setting powder and you're all set. You really can see the difference. Enlarge the three photos to compare.


Care & Feeding of Latex Ears

    Ok, now that you've had them on, you've had your fun, after the ball you have to take them off. There is a product sold called Spirit Gum Remover you can use if you used Spirit Gum. I haven't seen one for Liquid Latex, but if you use vaseline or Ponds cream and a cotton ball, you can work it into the joint. Personally, if you've only used the little dabs I told you to use, just crumpling them off in your hand hurts less than taking off a band-aid (and saves money!).

Your face
    Peel off any stray Liquid Latex left over from blending your edges (you did blend your edges, right?). Try not to rip out any wispy hairs unless you are compulsive like me and just can't help it.
    Take a little Albolene or Ponds Cold Cream and smear it all over anywhere you had makeup. Make a nice slurry mess of it.
    Wipe it off with tissues. Sure, you can use napkins or paper towels, but tissue are softer and nicer to your skin.
    Once you've gotten the stuff  wiped off, wash your face and ears with a nice gentle cleanser, pat dry and use a little moisturizer. Your skin will be happy with you.

Your Ears/Tips
    I always try to clean my ears/tips when I take them off and not let them sit around. Ok, you're exhausted and the last thing you want to do now that you've at least washed your face, is fuss with your ears. It won't kill them to wait until morning - but don't put it off, and don't pack them up and forget to clean them!
    Make sure you peel off any adhesive you put on. It's not so much a problem of them destroying the latex, as the buildup will begin to hurt when you wear them. Be neat, peel it off.
    You can use the same Albolene or Ponds to take off the makeup you put on your ears. Yes, the latex will absorb some of it. Once you've put makeup on them, they will never be the same shiny 'pink' they were when you got them. But then that wasn't your skin tone anyway so it's not really a problem. And yes, latex will darken with age, don't worry about it.
    Once the makeup is off the ears/tips, wash them. Go ahead and turn them inside out if you need to. Just wash off the residue of makeup and oils and let them air dry before you pack them away.

    That's really all there is to it. It seems like a lot, yes it takes a little time. But if you want the look, plan the time to do it right. It can make a lot of difference in appearance and how long your ears/tips last.
   

Copyright Judy Mitchell 2004